

How To Remove Otterbox Phone Case
Otterbox is one of the near durable tablet and smartphone cases you lot tin buy, but it's this durability that makes information technology difficult to remove from the device.

Remove the fastened waist pocketbook. If the device has a chugalug clip or other accompaniment attached, pop the large plastic ledge on the side of the example to remove it.
The process of removing the Otterbox Defender example is relatively similar for near devices. The difference will be in the number and type of guard pins.
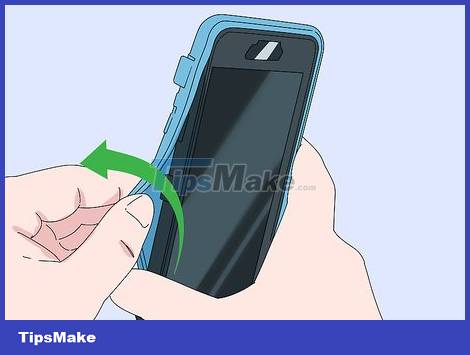
Observe the gap in the silicone case. The most difficult part of the procedure of removing the Defender case and prying the flexible silicone layer off. It's best to kickoff with the camera hole, the charging port, or the corner of the screen.
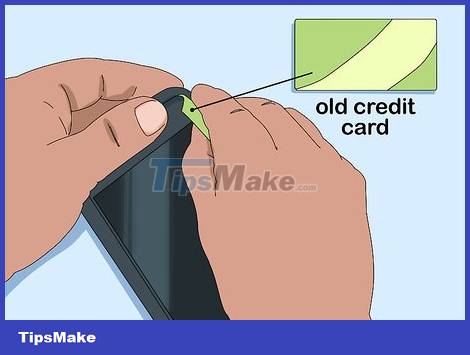
Insert the flat tool under the example. If you tin't insert your finger into 1 of these slots, you can use an erstwhile ATM card or some other piece of hard, flexible plastic. Insert the applicator into the bottom of the case and push it back and along until you can insert your finger into the gap.

Advisedly remove the silicone instance. Subsequently wedging the corner, you lot can push button your finger around the phone to remove the silicone case. Accept care when removing the silicone encompass in the open position of the ports to avoid tearing the port seal.

Notice the guard pin forth the border of the case. The new Defender case has protective pins along the side, which you lot tin can popular out with your finger. The larger the device, the more latches information technology will have. Usually, each corner will have a pin, with larger equipment there will exist an additional pin in the middle.
See more online if you use an iPad and don't see whatsoever plastic ledges or slots to open.

Remove one of the protective latches. Use your finger to pop out 1 of the latches along the side of the Defender instance. If you tin can't become your nail nether the latch, you'll demand to use a flathead screwdriver or a stiff ATM carte to pry information technology upward. The guard volition pop out from the lesser.
If you are using a tool, then, after prying the latch, turn it toward the front of the case. Practise not try to pull the latch backwards, or you volition impairment the plastic cover.
Some latches are much easier to remove, especially when all the safety pins are locked. If you lot're having trouble with one latch, try opening another.

Continue to remove the protective latch until the two parts of the case come up apart. The front and dorsum of the instance will split into two split parts. Do non effort to remove the cover until the latch is fully opened, or you lot will impairment the protective latch.
In some cases, yous may not be able to fully remove the latch if the device is still inside. Instead, piece of work along the height, bottom, and side edges, and then open the lid like a swivel.

Remove the outer cover. Y'all can remove the example by pulling on one of the four corners.

Remove the prophylactic cover. Push button one of the corners and then loop around the device until you remove the condom cover. Be careful when removing the encompass at the ports on the iPad because the rubber cover is easy to tear.

Plow iPad over so that the dorsum is facing yous. We volition remove the encompass from the back.

Slide the bottom piece down. This slice will slide down about 2.5cm beneath the Apple logo.

Pry up the circumvolve to a higher place the Apple logo. This circle is the pin that holds the two pieces of shell together.

While yous pry the circle, pull the acme comprehend away from the iPad. The case is carve up into 2 pieces, and when the circumvolve is pulled upwards, the top half of the case separates and is removable.

Remove the iPad from the bottom half of the instance. You can at present push the iPad out of the bottom case. Stick the last 2 pieces together if you lot want to store them.

Beginning from the top edge of the device. You should be able to remove the plastic part from the case easily if you lot proceed from the top.

Pry the plastic part up and pull it out. You may need to lift it up a chip then that the case doesn't go defenseless in the buttons on the side of the phone. In one case the peak plastic cover is removed, the balance of the example should be very like shooting fish in a barrel to handle.

Push the rubber cover out of the corners with your thumb. Starting at the corner is the easiest style to remove the rubber cover. The rubber encompass is quite tight, so you need to push a piffling harder.

Go along pushing around to remove the condom cover from the device. You should be conscientious with the ports considering the rubber cap is very easy to tear.

Push button out ane of the corners of the case with your pollex. Symmetry is one of the Otterbox series of cases with the simplest blueprint: simply a flexible silicone case that covers the phone's back embrace. The rubber cover is very tight, and then yous should push the example out at the corner position beginning. Otterbox recommends that users start from the top border.

Use a hard plastic card if necessary. Insert a card (such as an ATM) nether the edge of the flexible case and pry dorsum and forth to split the case. Then you take the safety comprehend and pull it out of the device.

Go on to pry around the crush. In one case you get a corner upward, you can continue to pry effectually the edge of the case to remove it. Exist careful non to tear the gate comprehend.

The touch on is evenly applied to the waterproof case models. The waterproof instance forms a very tight seal around the device. Changes in distance or temperature tin cause a pressure differential that makes removing the example fifty-fifty more difficult. In this case, apply the equalizing strength by inserting the coin into the gap side by side to the pivot on the front, and then rotate the coin. Larger cases will have a "purge knob" on the front of the example, which you can rotate to open and equalize pressure level.
Tighten the purge knob before using the instance again. The phone case volition not be waterproof if the knob is open.

Open up the hinged Armor instance. Some Otterbox cases, such equally the Armor series for iPod bear on, practice not divide into two parts. Instead, these types of cases volition open when y'all turn the latch on the back. The example volition pop out just plenty for you to get to the phone, but the 2 parts will remain inseparable.

How To Remove Otterbox Phone Case,
Source: https://tipsmake.com/how-to-remove-the-otterbox-case-for-cleaning
Posted by: feltsfaverectoor.blogspot.com
0 Response to "How To Remove Otterbox Phone Case"
Post a Comment